Creating an Abstract Watercolor Wallpaper
Monday, 4 June 2012
0
comments
| There are plenty of ways to create a Watercolor Effect in Photoshop. Some are very cheesy and you can easily tell that a simple filter has been used. In this tutorial, we will be using Layer Masking. It is one of the most fascinating and powerful Photoshop method, to use layer masks in your designs. |
| Preview of Final Image |
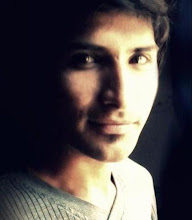
Let us start off by creating a canvas of 1920X1200 pixels, in RGB mode. I found a picture of Jim Morrison (you can obviously use any of your favourite characters, or your own picture for that matter). I found the picture here. Copy and paste the image into our canvas. Use transform and scale it to fit our canvas by holding down the Shift-Key. This keeps the original aspect ratio of the image and it does not look stretched. |
| Even though the picture I am using here is a small resolution one, it will not matter much since I will be using some filters that will remove any sort of pixelation. Adjust Brightness/Contrast and then duplicate the layer. |
| Apply Watercolor filter from filter gallery to the duplicated layer. Name this duplicated layer as “Watercolor Filter”. |
| Select the original layer and NOT the “Watercolor Filter”. Go to Image > Adjustments > Threshold. Name this original layer as “Threshold Effect”. |
| Set the Blending mode to Multiply, and merge both, “Watercolor Filter” and “Threshold Effect” layers. So, we now have a “Merged Layer”. |
| Now open some images I took from the Media Militia Sampler Pack, download it here. |
| Get to the “Merged Layer”. Select and copy the image into the layer. Add a Layer Mask to “Layer 1″. Alt + click on the layer mask, and you will see the canvas is in white. Paste the image here, and Ctrl + I to invert the colors. This way, the layer mask hides the Blacks, and reveals the Whites. Click back onto the layer and we can see our image. |
| Use some paper textures from Bashcorpo, you’ll find it here. Set it to Linear Burn mode. |
| Clone some areas in the “Layer 1″ using the Clone Tool. This makes the image look more complete. |
| Finaly, add some more watercolor splashes from the Media Militia Sample and add a fancy text, oriented like what I have in this image below. Now you have an abstract watercolor design. You can use your creativity and innovate more on this effect. Hope you had fun in this tutorial! |


